
Implement a CHIP-8 emulator in Python
For quite some time I entertained the idea of implementing an emulator. My knowledge of low level programming is mostly teoretical and this would be a good chance to learn more, and also to experiment with optimizations I rarely encounter in my usual machine learning tasks (being based on libraries like Numpy and Scikit-learn which already take care of the heavier operations).
The Game Boy is an obvious candidate, being it a console I had as a kid, well documented and for which there are many existing implementations including a Python one.
Inspired by an article about exactly this task, however, I first went forward with a smaller and simpler emulator, a CHIP-8 emulator.
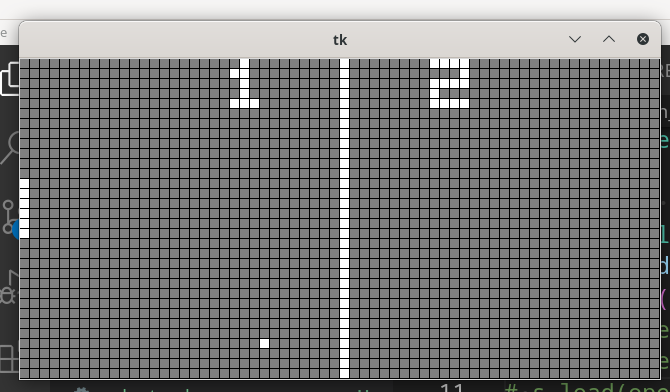
My emulator running Pong
CHIP-8 is an interpreter that reads a bytecode quite similar to what a game boy uses, with registries, sprites, conditional jumos and special instructions to read the keys. It’s however more than 10 years older than the Game Boy and much simpler, for one the pixels on the screen for CHIP-8 are much less and either black and white whereas the original Game Boy has 4 levels of grey and a much larger screen (160×144 rather than 64×32).
I dedided to implement it without any library but the Python standard library and in compliance to mypy running in strict mode. This should help in case later I want to use mypyc, and enforce a cleaner code on such a potentially strange use case.
The resulting emulator result is on Github, except for the sound it is working fine.
I did follow this CHIP-8 emulation guide for the most part, checking on the internet for unclear details. In this article I’ll go through what I learned.
How much time does it take?
I was surprised by how easy this ended up being. It took in total 2-3 hours to implement from scratch, and I am definitely not an expert in this field. The only bytecode I know well is the JVM one, and I don’t touch it since years.
Turns out Python can handle bit manipulations just fine:
- a
bytearrayhandles a memory-efficient byte blob, that can be manipulated just like a list including slice - Numbers can be written in base 16 with a leading
0x, e.g.0xC1, or octal as0o12 - Raw bits can be seen with
bin(x) - Bitwise operations
&,|,^work as expected, and have assignment versions like|= - “Raw” byte data can be used in
match...casestatements, in general values from abytearraybehave likeint, but a value outside the0-255range generates errors when written in the bytearray (there’s no implicit overflow nor capping) - Other data types typical of C can be replicated using
array. For examplearray.array("H")gives anunsigned shortarray, memory efficient but with the ergonomy of a normal list
Endianess and hexdump
A small issue I found very soon is how hexdump represents endianess. My emulator decodes each instruction with a big match...case statement, ending with a default case which throws an exception to report instructions that did not match any pattern. This means some instruction type was not implemented yet or a previous JMP instruction sent us to an address that is not supposed to be executed. Or worse, previous instructions were incorrectly decoded and modified the code in RAM (good luck troubleshooting that!).
Since CHIP-8 cartridges are very small I handled these cases by simply reading the instructions using hexdump. Turns out that by default hexdump kindly rearranges the bytes according to the local machine endianess, in my case then I saw all byte pairs swapped, while Python’s read() got the actual content.
With hexdump -C it’s possible to disable this behavior.
Unicode blocks
My first implementation used the terminal as a display, using . and #. It works but the result is a bit ugly due to line spacing.
Unicode luckily defines a set of characters called block elements that are specifically designed to represent graphics in the terminal. Using █ and ░ solves it.
Tkinter
The terminal is easy to use but to implement a screen that can refreshed and receive user input I switched to the Tkinter module that comes with the Python stdlib. In theory it’s possible to do this in the terminal as well, but it’s cumbersome and hard to implement in a cross platform way. My goal was to not use extra libraries, otherwise I would have used Rich.
Tkinter makes it trivial to display graphics using the Canvas widget, and can easily detect keyboard events with callbacks.
When reading the keyboard events, a callback is invoked every time with an event object, which in this case contains the details of the keyboard or mouse button. There are many keyboard layouts used across the world, for example German keyboards have the Z and Y swapped (I have a German keyboard at home and a British one on the computer and this destroyed my muscle memory), and for applications like this one we want to know where a key was, not which letter it represents.
This can be detected by reading the scancode. Curiously, I already dealt with this when implementing a wrapper on the VirtualBox SOAP interface, one of the weirdest thing I ever implemented.
Tkinter provides this information already decoded as event.keysym, without extra steps.
Unfortunately, it seems that the X server on Linux intercepts long keypress events and generates a fast up-and-down sequence of events that is noisy to read. I use Wayland but probably this window is using XWayland. I didn’t investigate further, except for the noise in the log this doens’t break the application. Just be aware of it.
Another problem with Tk is that it’s blocking. When you invoke root.mainloop() the Python interpreter will be stuck on executing the GUI code and resume running only once the window is closed. TKinter is not thread safe, so I simply start the window logic in a separate process and use multiprocessing.Queue to let it send events to the emulator core and receive updates to the screen data to display.
Overall, I am quite happy with how simple it is to use TKinter for simple operations, considering that it’s multiplatform and requires no dependencies. It’s just not exactly glamorous, but it does it’s job quickly and simply.
Protocols
As mentioned, I initially developed the display in the terminal and then switched to a window. I want to keep both and define the interface so that Mypy can check the code and a new display can easily be implemented in the future. This is what a Java interface would do, but Python doesn’t have this concept.
Usually at this point I’d use an Abstract Base Class, a Python metaclass that allows to override isinstance(...) and similar with custom logic to check if a class is following some rule (e.g. to check if a class has __hash__ and then it’s hashable). This is a powerful tool but cases like mine is as practical as folding an origami wearing gloves.
Luckily, Python also has typing_extensions.Protocol. The way this works is similar to what happens in TypeScript, and is called structural subtyping (or duck typing, as in “If it walks like a duck and it quacks like a duck, then it must be a duck”).
It’s fairly intuitive:
# file: core.py
from typing_extensions import Protocol

class Display(Protocol):
    def clear(self) -> None:
        ...

    def draw(self, x: int, y: int, sprite_data: bytearray) -> bool:
        ...


def use_display(my_display: Display):
    my_display.clear()

# file: tk_display.py

class TkDisplay:
    def clear(self) -> None:
        self.screen = 0
notice that ... here is the real content of the function.
The Protocol class tells mypy and other type checkers that this class is defining a set of methods that MUST be present in a class to consider it a Display object. Other methods can be present.
Then, TKDisplay has to implement these methods (plus others, if needed), but has no need to refer to the protocol class or declare its intention to implement it as you would in Java.
This is quite simple and concise, and the message from Mypy is helpful because it hints to what is missing to satisfy a protocol (like TypeScript does in a similar situation).
Additionally, I could split this logic into two protocols, Display and Control, so that the two functionalities can be handled by separate classes.
“Dialects” of CHIP-8
An annoying aspect of CHIP-8 is that actually there are a few CHIP-8 dialects, similar but not equal, and every manual and cartridge is implicitly based on one or another. Often this is not clear and I ended up mixing them.
For example the 2-bytes instruction 0x8X 0xY6 shifts the register X but first assigns Y to it in the original implementation, and only shifts in the most common and recent one.
When in doubt, I used the most common version, it seems this is what the test roms tend to use.
Debugging
An essential aspect of developing an emulator is debugging, even more than any other application. The code is going to run thousands of operations, often not very intuitive, and the result is affected by the combined effect of all of them.
For the CHIP-8, as for the Game Boy, there are test cartridges designed to test the correctness and completeness of an implementation. Still, some manual work is going to be needed.
Eventually my implementation worked without much fuss so I didn’t implement anything fancy, but I think this is a case where unit tests are very precious. Also a good idea would be to implement a Debug protocol together with Display and Control to be able to see the registers and the current instruction and stop the emulator at any time.